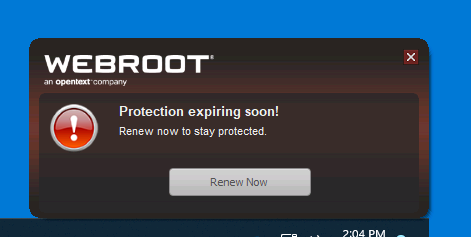
Ok it looks like we have a fix , I did have to uninstall the program off each one that had the problem per instructions then reinstalled with the link to the download , make sure you download a new download just to make sure they didn’t add anything needed, I will attach the instructions support sent to me to follow that worked..
Thank you for contacting Webroot Support.
In order to address the issue you reported, please uninstall and then reinstall Webroot SecureAnywhere using the special steps below.
** Note: Uninstalling and reinstalling SecureAnywhere may reset any program settings you have personalized. Please make sure to check your settings and adjust them as necessary after reinstalling.
* * Part 1: Uninstall * *
1a. For Windows XP/ Windows Vista / Windows 7:
Open the Windows Start menu.
Click Programs or All Programs, then navigate to the Webroot SecureAnywhere folder.
Under Webroot SecureAnywhere, open the Tools folder, then click Uninstall Webroot.
Click Yes and follow any prompts that appear.
1b. For Windows 8:
Move your cursor to the bottom right of the screen to open the Charm Bar menu.
Click Search, then type "appwiz.cpl" (without quotes), and press Enter on your keyboard.
Scroll down the programs list until you see the Webroot security product.
Click the Webroot security product entry once to select it, then click Uninstall/Remove.
When asked if you are sure you want to uninstall, click Yes and follow any prompts that appear.
1c. For Windows 10 and 11:
Using the 'Search' feature on your task bar, type "appwiz.cpl" (without quotes), and press Enter on your keyboard.
Scroll down the programs list until you see the Webroot security product.
Click the Webroot security product entry once to select it, then click "Uninstall/Remove."
When asked if you are sure you want to uninstall, click "Yes" and follow any prompts that appear.
2. Restart your computer.
3. Click the Windows Start button.
4. Follow the steps below for your Windows version:
a. Windows XP: Click Run, then enter the following text into the field exactly it appears below, and then press Enter:
%ALLUSERSPROFILE%\Application Data
b. Windows Vista or Windows 7: Click in the Search box above the Start button, then enter the following text into the field exactly as it appears below, and then press Enter:
%PROGRAMDATA%
c. Windows 8: Move your cursor to the bottom right of the screen to open the Charm Bar menu. Click Search, enter the following text into the field exactly as it appears below, and then press Enter:
%PROGRAMDATA%
d. Windows 10 and 11: Using the Windows 'Search' feature on your task bar, search for "Run" and open the app to open the Run dialog box. Afterwards, enter the following text into the field exactly as it appears below, and then press Enter/OK:
%PROGRAMDATA%
5. Locate the WRData folder. This folder may not be present; if it is not, then continue to Part 2. If it is present, right-click the WRData folder and select Rename. Change the name to WRData1.
* * Part 2: Install * *
To reinstall, click the link below to download the latest installer.
<a href="https://anywhere.webrootcloudav.com/zerol/wsainstall.exe">https://anywhere.webrootcloudav.com/zerol/wsainstall.exe</a>
If you are installing on a Windows XP system, please use the link below:
<a href="https://anywhere.webrootcloudav.com/zerol/wsafnl.exe">https://anywhere.webrootcloudav.com/zerol/wsafnl.exe</a>
1. Save the file to your desktop.
2. Double-click "wsainstall.exe" or “wsafnl.exe” if on Windows XP, to run the installer.
3. Enter your keycode when prompted.
4. Click Agree and Install.
5. If asked "Would you like to automatically import the settings that were used in your previous installation?", click No. Webroot SecureAnywhere reinstalls itself.
A scan may begin automatically, depending on how recently a scan was completed.
This should resolve the issue you reported. If not, please send us another message to let us know so that we can assist you further.
Thank you,
The Webroot Technical Support Team


